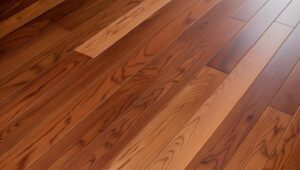

Once your new hardwood is chosen and the date is booked, a new set of questions usually follows. You may wonder when the crew will arrive, whether you need to stay home, where the pets should go and how long the noise will last. Knowing what to expect makes the day far easier to plan.
On hardwood floor installation day, the crew arrives, protects your home, removes old flooring if needed, and checks moisture levels and the subfloor. Next, they lay and secure the planks, add trim and transitions, clean up, and walk you through your finished floor.
The exact timeline depends on your home, the flooring type and the installation method. Understanding the process ahead of time helps your hardwood floor installation in Brooklyn run smoothly, from the first knock on the door to the final walkthrough.
How to Prepare for Hardwood Floor Installation Day
Good preparation starts a few days before the crew arrives. Getting your home, your building and the flooring ready keeps installation day on schedule.
Preparing Your Home
Clearing the space gives installers room to work safely and efficiently. A few simple tasks make a big difference:
- Move furniture out of the rooms
- Pack away fragile decor
- Remove items from closets being floored
- Plan a space for pets and children
- Keep the HVAC running at normal settings
Day-Before Checklist
Confirm the arrival time, clear a path from the entrance to the work area and set aside a spot for the crew’s tools and materials.
Building Approvals in Brooklyn Co-ops and Condos
Many Brooklyn co-ops and condos have rules for renovation work. Buildings often ask for a certificate of insurance from the installer, a signed alteration agreement or an elevator reservation for deliveries. Checking these requirements with your management company a week or two ahead helps avoid delays on the day itself.
Letting the Flooring Acclimate
Hardwood reacts to temperature and humidity, so the boards need time to adjust to your home. Depending on the product, flooring may be delivered a few days before installation and left in the rooms where it will be installed. Proper acclimation reduces the risk of gaps, cupping or buckling later.
What Happens on Hardwood Floor Installation Day: Step by Step
Installation day follows a clear sequence, though the details vary by home. Here is what typically happens from start to finish.
Step 1: Crew Arrival and Walkthrough
The day begins when the crew arrives and reviews the project with you. They confirm the rooms, the flooring layout, the plank direction and any special details like transitions or stairs. In New York City, the approved hours of construction are during weekdays between the hours of 7:00 a.m. and 6:00 p.m., so most crews start in the morning and plan noisy work within that window.
Step 2: Protecting Your Home
Before any tools come out, installers protect the areas around the work zone. Common steps include:
- Covering nearby floors
- Protecting doorways and walls
- Sealing off dusty areas
- Setting up a cutting station
Step 3: Removing the Old Flooring
Older carpet, vinyl or worn wood often stands between you and your new floor. When removal is part of the project, the crew pulls up the old material, removes staples or nails and hauls away debris. Clearing the surface fully gives the new hardwood a clean starting point.
Step 4: Testing Moisture and Checking the Subfloor
Moisture testing is one of the most important steps of the day. Installers use a meter to check both the subfloor and the flooring, since the moisture content of the wood flooring and the subfloor should be within 2 percent for plank flooring and 4% for strip flooring. The crew also checks the subfloor for loose areas, squeaks or damage that need attention first.
Step 5: Leveling the Subfloor
Uneven subfloors are common in older Brooklyn homes, and they can cause hollow spots or movement in a new floor. Plywood leveling works well over wood subfloors, where installers shim low areas and add plywood to create a flat surface. Self-leveling compound suits concrete subfloors, filling dips to create a smooth base for glue-down installations.
Step 6: Laying Out the First Rows
First rows set the tone for the entire floor, so installers take extra care here. The layout usually follows a clear sequence:
- Snap a straight reference line
- Leave an expansion gap along the walls
- Set the starter row along the longest straight wall
- Mix boards from several boxes for natural color variation
- Stagger the end joints for strength and appearance
Step 7: Securing the Planks
Once the layout is set, the crew installs the remaining boards using the method suited to your flooring and subfloor:
- Nail-Down: Nails driven at an angle through the tongue, used over wood subfloors
- Staple-Down: Staples secure thinner engineered planks to a wood subfloor
- Glue-Down: Adhesive bonds engineered planks directly to concrete or plywood
- Floating: Boards connect to each other over an underlayment without fastening down
Step 8: Trim, Transitions and Finishing Details
After the main floor is in place, installers turn to the details that give the room a finished look. They install baseboards or shoe molding, fit thresholds where the hardwood meets other flooring, and trim door casings so boards slide neatly underneath. Stair nosings and vent covers are also added where needed.
Step 9: Cleanup and Final Walkthrough
The day ends with a full cleanup and a walkthrough of the finished floor. Installers remove scraps, vacuum the surface and check for any gaps or loose boards. This is also the best time to ask questions about care, cleaning and when you can bring furniture back.
A smooth installation depends on choosing the right method for your floor and subfloor. Our installers at Floorika Fine Hardwood work with nail-down, staple-down, glue-down and floating methods, along with plywood and self-leveling prep for uneven subfloors. Every job finishes with a quality control check before we hand the floor over to you.
Prefinished vs Unfinished Hardwood: How Installation Day Differs
The type of hardwood you choose changes what installation day looks like. Prefinished and unfinished floors follow very different timelines.
Prefinished hardwood arrives already sanded, stained and sealed. Installation usually finishes in one visit, and you can often walk on the floor right away.
Unfinished hardwood is installed raw, then sanded, stained and coated on site over several more days. Finishing products can release fumes, and concentrations of many VOCs are consistently higher indoors (up to ten times higher) than outdoors, which makes good ventilation important during and after the finishing stage.
How Long Does Hardwood Floor Installation Take?
Installation time depends on the size of the space, the flooring type and the condition of the subfloor. Typical timelines look like this:
- Single room: Often completed in one day
- Several rooms or a full apartment: Usually one to three days
- Large homes or complex layouts: Can take several days
- Unfinished hardwood: Adds several days for sanding, staining and drying
- Patterned floors: Herringbone or chevron layouts take longer to cut and fit
Subfloor repairs, old flooring removal and stairs can also extend the schedule.
Noise, Dust and Disruption: What to Expect
Installation day is busy, and some noise is unavoidable. Saws, nail guns and staplers make the most sound, especially during cutting and fastening.
Prefinished flooring creates far less dust than unfinished floors, since sanding is not needed. In apartments and brownstones, neighbors may hear the work during the day, which is why giving them a heads-up is a thoughtful step.
Here is what most homeowners notice during the day:
- Steady noise from saws and nailers
- Limited access to work areas
- Light dust near the cutting station
- Crew members moving in and out
Should You Stay Home During Hardwood Floor Installation?
You do not need to stay home for the entire day, though being present at key moments helps. Plan to be there when the crew arrives to confirm the layout and again at the end for the final walkthrough.
Children and pets are usually safer away from the work area, since tools, cords and loose boards create hazards. Many families plan a day out or set up a quiet room away from the installation.
Pet and Kid Tip
Set up a closed room with food, water and toys for pets, or arrange a sitter for the day. Keeping them away from tools and open doors reduces stress for everyone.
After Installation: When Can You Walk on the Floor and Move Furniture Back?
Once the crew leaves, the next question is usually when life can return to normal. The answer depends on the flooring type and installation method.
- Prefinished Nail-Down or Staple-Down: Light foot traffic and furniture can usually return the same day
- Glue-Down Installations: Light traffic often waits about 24 hours while the adhesive sets
- Floating Floors: Usually ready for use right after installation
- Site-Finished Floors: Light traffic after the finish dries, furniture after a few more days
- Area Rugs: Often best added after the finish has fully cured
Adding felt pads to furniture legs and lifting pieces rather than sliding them protects the new floor.
Caring for a new floor starts the moment installation ends. We give every client a full education on post-installation care, covering cleaning, protection and what to avoid in the first weeks. You leave knowing exactly how to keep your hardwood looking its best for years.
Tips for a Smooth Hardwood Floor Installation in Brooklyn
A little planning goes a long way, especially in busy city buildings. These tips help your hardwood floor installation in Brooklyn stay on track:
- Confirm building rules early
- Reserve the elevator if needed
- Arrange parking for delivery
- Clear rooms the night before
- Let neighbors know the schedule
- Keep the HVAC running normally
FAQs
What happens on hardwood floor installation day?
On installation day, the crew arrives, protects your home, removes old flooring if needed, tests moisture, prepares the subfloor, lays and secures the planks, installs trim and transitions, then cleans up and reviews the finished floor.
How long does hardwood floor installation take?
Most single rooms take about one day, while full apartments or several rooms usually take one to three days. Unfinished hardwood adds several days for sanding, staining and drying before the floor is ready.
Do I need to be home during hardwood floor installation?
No, you do not need to stay home all day. Being present when the crew arrives and again for the final walkthrough helps confirm the layout and answer any questions about the finished floor.
Do I need to move furniture before hardwood installation?
Yes, furniture should be moved out of the rooms before installation. Clearing the space gives installers room to work safely, protects your belongings and helps the project stay on schedule.
Can I walk on hardwood floors right after installation?
Yes, you can usually walk on prefinished nail-down or floating floors right after installation. Glue-down floors often need about 24 hours, while site-finished floors need time for the finish to dry.
Is hardwood floor installation noisy?
Yes, hardwood floor installation creates some noise from saws, nail guns and staplers. Most noisy work happens during daytime hours, and prefinished flooring keeps dust and disruption lower than unfinished floors.
Does hardwood flooring need to acclimate before installation?
Yes, hardwood flooring usually needs to acclimate before installation. Letting the boards adjust to your home’s temperature and humidity helps reduce gaps, cupping and buckling after the floor is installed.
Getting Ready for Your New Floor
Hardwood floor installation day follows a clear path, from protecting your home and testing moisture to laying the planks and finishing the trim. Preparing the space, checking building rules and letting the flooring acclimate ahead of time keep the day calm and efficient. Knowing what to expect also makes decisions about pets, kids and furniture much easier.
The final result depends on careful work at every stage, from subfloor leveling to the last transition strip. Floorika Fine Hardwood supports that process from the start, delivering flooring to all five boroughs and the tri-state area with lift-gate service and scheduled appointments. Your hardwood floor installation in Brooklyn can move from booking to finished floor with confidence.