New hardwood arrives, the boxes get stacked in the living room, and the temptation is to start nailing boards down that afternoon. Rushing this one step is what leaves gaps, cupping, and buckled planks a few months later. Wood is a living material that keeps trading moisture with the air, and it performs best between 30 and 50 percent humidity. Proper hardwood flooring acclimation gives the planks time to settle to the moisture level of the room before a single board goes down.
Skip it, and even the finest European oak can twist, shrink, or lift once the seasons turn. The planks you install in a dry January will meet a humid July, and wood that never adjusted has nowhere to put that extra moisture. Getting the timing right is what protects the floor, and the investment, for decades of use.
What Hardwood Flooring Acclimation Means
Wood never stops responding to the air around it. Each plank gains or loses moisture until it matches the humidity and temperature of its surroundings, a balance point known as equilibrium moisture content. “Hardwood flooring acclimation is the process of letting the boards reach that balance for your specific room before they are installed. Wood keeps drifting toward the equilibrium set by the room’s temperature and humidity, which explains why the same floor behaves differently in a dry Denver winter and a humid Gulf summer.”
Skipping this stage forces the wood to do its adjusting after installation, when there is no room left to move. That is when a tight, beautiful floor turns into one with gaps or raised edges. The goal is simple to state and worth the wait. Bring the wood to the moisture level it will live at, then fasten it down while stable.
Did You Know
Most hardwood is milled to a moisture content of 6 to 9 percent, the same range a home holds when kept between 60 and 80 degrees and 30 to 50 percent humidity. The flooring is built to match a conditioned room, never a job site still under construction.
Why Acclimation Matters More in Some Homes
The same delivery can need very different timing from one address to the next. Three conditions decide how much a floor has to adjust before it goes down.
Climate and Region
Where the home sits changes the target the wood has to reach:
- Humid and coastal areas push moisture into the boards and slow the release
- Dry inland climates pull moisture out, leaving wood to soak some back up indoors
- Heated winters drop indoor humidity sharply, even in a mild region
A Brooklyn brownstone with steam heat runs drier in winter than a ground-floor apartment near the water, and each one asks something different of the same floor.
Season of Delivery
Timing within the year shifts the work too. Wood delivered in a damp August arrives carrying more moisture and needs to release it slowly. The same order in a dry February arrives drier and often settles faster. Running the home’s normal heating or cooling through acclimation keeps that seasonal swing under control.
Subfloor and Site
The surface underneath tells its own part of the story. Wood over a dry basement behaves differently from wood going over a concrete slab that still holds construction moisture. Reading these conditions before delivery is where an experienced supplier earns its keep, and the team at Floorika helps clients match the right product and timing to their specific space before anything ships.
What You Need Before You Start
Acclimation goes smoothly when the right tools and conditions are ready ahead of the delivery. Gather these first:
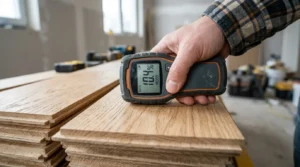
- A moisture meter, either pin-type or pinless, to read both wood and subfloor
- A working thermostat and hygrometer to track temperature and humidity
- A functioning HVAC system, or a temporary heater and dehumidifier on new builds
- Spacers or stickers to cross-stack the boards for airflow
- A notebook or phone to log every reading by date
Having these on hand turns acclimation into a measured process rather than a guess. Skipping the meter is the most common shortcut, and it removes the only reliable way to know the wood is ready.
How to Acclimate Hardwood Flooring Step by Step
Getting the wood ready follows a clear order. Each step below builds on the one before it, and none of them should be skipped to save a day or two.
-
Set the Room to Normal Living Conditions
Turn on the heating or air conditioning and hold the space at everyday living conditions before the wood arrives. Aim for 60 to 80 degrees Fahrenheit and 30 to 50 percent relative humidity. Run the system for several days until the room reflects how it will feel once people live in it. Delivering wood into a space still being painted or plastered undoes the whole effort. Wet trades push humidity well above normal. Finish that work first and let the climate settle before the floor arrives.
-
Test the Subfloor and Room Moisture
Check the subfloor with a moisture meter and write down the reading before anything else happens. That number tells you the target the flooring needs to reach. Wood subfloors give a quick, direct reading. Concrete slabs need their own moisture test, because a slab that looks dry on top can still hold moisture deep inside that ruins a floor from below.
Watch For
A fresh concrete slab can read dry at the surface while holding moisture underneath. Tape a two-foot square of plastic sheeting tightly to the slab overnight. Beads of condensation under the plastic the next morning mean the slab is not ready for wood.
-
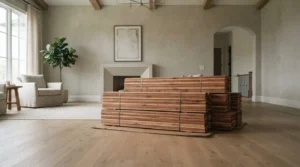
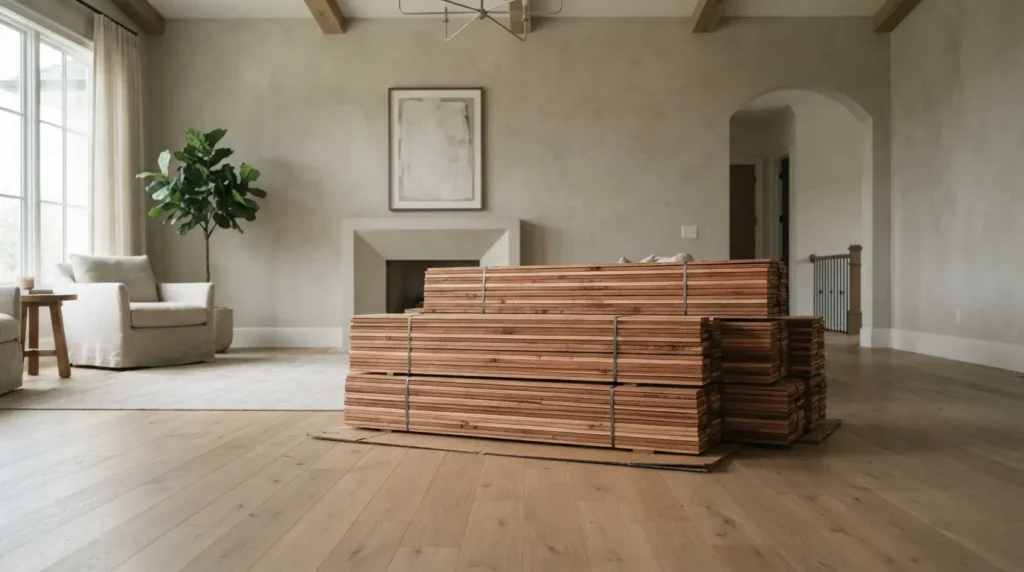
Deliver the Wood and Open the Boxes for Airflow
Air has to reach every board for acclimation to work. Once the delivery arrives, prepare it properly:
- Break the shipment into small lots rather than one tall pile
- Open the cartons or cross-stack the boards with spacers between layers
- Keep everything raised off a concrete slab, never flat against it
- Leave space between stacks so air moves freely on all sides
Store the wood in the room where it will be installed, not a garage or basement that reads a different climate. The whole point is to let the boards learn the conditions of their permanent home.
-
Take a Baseline Moisture Reading
Measure the wood as soon as it is unboxed and record where the numbers start. Check several boards for a true picture, using roughly 40 boards for every 1,000 square feet. Logging this baseline lets you track how far the wood still has to travel before it matches the room and the subfloor.
Pro Tip
Mark the exact boards you test with a pencil and re-check the same ones each time. Readings vary from plank to plank, and following the same boards shows the real trend rather than the noise between one board and the next.
-
Let the Wood Adjust and Re-measure
Patience does the work in this stage. Leave the boards in the room and re-check the marked planks every couple of days. Given enough time, the wood settles into equilibrium with the room around it. Readings that stop changing across two or three consecutive checks are the signal that the wood has stabilized.
-
Confirm the Moisture Range Then Install
Compare the final wood reading against the subfloor one last time before installation begins. The two must fall within an accepted range of each other:
- Solid strip under 3 inches wide: Within 4 percent of the subfloor
- Wide plank 3 inches and wider: Within 2 percent of the subfloor
- Engineered flooring: Usually within 2 percent, following the manufacturer
Once the numbers line up, the floor is ready to go down with confidence. Rushing past this final check is the single most common cause of callbacks, and the fix costs nothing but patience.
Common Mistake
Leaving the planks sealed in tight, stacked cartons blocks air from reaching the wood and stalls everything. Break the delivery into smaller lots and open or cross-stack the boxes so every board can breathe.
How Long Does Hardwood Flooring Acclimation Take?
Three days is the number people repeat, and it is rarely the right one. Hardwood flooring acclimation usually runs 7 to 14 days, though the calendar matters far less than the moisture meter. Wood that reaches the correct range in five days is ready in five days. Boards still drifting after two weeks need longer, whatever the schedule says. Measured stability, never a fixed count of days, decides when installation can start.
Region and Climate
Where the home sits sets how far the wood has to travel:
- Dry inland areas like Denver hold wood around 4 to 7 percent moisture
- Humid coastal regions push the same wood past 12 percent
Flooring shipped from a mill in one climate to a home in another has the widest gap to close, and that adds days to the process.
Season of Delivery
The time of year matters as much as the map. Wood delivered in a damp summer arrives carrying more moisture and needs to release it slowly. The same order in a dry, heated winter arrives drier and often reaches balance faster. Running the home’s normal heating or cooling during acclimation keeps the swing under control either way.
Wood Species and Board Width
Some boards simply take longer than others:
- Dense species such as hickory or Brazilian cherry react more slowly than softer domestic oak
- Wide planks and thick solid boards hold more moisture across their mass than narrow strips
Both traits stretch the timeline, and a wide plank in a dense species asks for the most patience of all.
Solid vs. Engineered Construction
Solid wood moves the most and demands the longest window. Engineered boards are built in cross-layered plies that resist swelling, which is why many stabilize sooner or need no separate acclimation at all. The manufacturer’s instructions set the final rule for engineered lines.
Site and Subfloor Conditions
A home still under construction throws off every reading. Fresh paint, plaster, and joint compound all release moisture into the air, and a newly poured slab keeps releasing it for months. Wood cannot settle to a true living condition until the wet work is finished and the climate holds steady.
If you are planning a project around a deadline, build this window into the schedule from the start. Floorika keeps its European oak and solid lines in stock and can walk you through realistic timing before you commit to an installation date, which keeps the whole job from stalling at the last step.
Quick Check
Take readings on several boards and the subfloor over two or three days. Once the numbers stop moving and stay within range of each other, the wood has reached equilibrium and is ready to install.
Acclimation Needs by Flooring Type
Different products react to moisture at different speeds, which changes how much acclimation each one needs. Floorika stocks solid, wide plank, and engineered lines, and the guidance shifts across all three.
| Flooring Type | Acclimation Need | Tolerance to Subfloor |
| Solid strip (under 3″) | Full acclimation, often 1 to 2 weeks | Within 4% |
| Wide plank solid (3″+) | Full acclimation, watched closely | Within 2% |
| Engineered | Often shorter, per the manufacturer | Usually within 2% |
Solid wood moves the most and demands the most patience. Engineered boards are built in cross-layered plies that resist swelling, which is why many need less time, though the manufacturer’s instructions always set the final rule. Wide plank belongs in its own category, since a broad board shows every bit of movement that a narrow strip would hide.
Do Vinyl and Laminate Floors Need Acclimation Too?
Wood is not the only material that adjusts to a room. Luxury vinyl and laminate both expand and contract with temperature, though for different reasons than solid wood.
- Laminate: A fibreboard core reacts to humidity much like hardwood, so most brands ask for 48 hours flat in the installation room.
- Luxury vinyl: Sheets and planks respond mainly to heat, and they usually need 24 to 48 hours to reach room temperature.
Both materials still call for a stable, conditioned space and the manufacturer’s exact timing. Confirming that window before delivery keeps a click-lock floor from gapping or peaking after it goes down.
What Happens If You Skip Acclimation
Installing wood before it stabilizes hands the moisture problem to the finished floor. Four kinds of damage show up most often:
- Gaps: Boards that dry out after installation shrink and pull apart, leaving visible lines between planks.
- Cupping: Edges rise higher than the center when the underside holds more moisture than the top.
- Buckling: Planks that took on too much moisture press against each other and lift clean off the subfloor.
- Crowning: The middle of each board swells above its edges after moisture works up to the surface.
Every one of these means sanding, refinishing, or a full replacement, all of it avoidable. Time spent up front costs far less than tearing out a floor that failed within its first year.
How to Keep a Floor Stable After Installation
Acclimation protects the floor going in, and steady conditions keep it sound for the years that follow. Wood continues to react to its environment long after the last board is nailed down, expanding slightly in humid months and contracting in dry ones.
- Keep indoor humidity between 30 and 50 percent year round
- Run a humidifier in dry winter months and a dehumidifier or AC in humid summers
- Hold the temperature in the normal 60 to 80 degree living range
- Wipe up spills quickly and avoid wet-mopping hardwood
Holding the home in the 30 to 50% range that limits mold and protects wood does the same job after installation that acclimation did before it. A little seasonal movement is normal even in a well-kept home, and small gaps that appear in winter usually close again by summer.
Frequently Asked Questions
Can you install hardwood floors without acclimating them?
Installing without acclimation risks gaps, cupping, and buckling once the wood adjusts to the room on its own. Solid wood is especially prone to failure. Some engineered products allow it, but only when the manufacturer states so in writing.
How can you tell when hardwood flooring is fully acclimated?
Take moisture readings on several boards over consecutive days. The wood is ready when the numbers stop changing and fall within 4 percent of a wood subfloor for strip flooring, or 2 percent for wide plank and engineered boards.
Does engineered hardwood need to acclimate?
Engineered flooring is more stable than solid wood and often needs a shorter adjustment period. Certain click-lock products need none at all. The manufacturer’s instructions always decide, since guidelines vary by brand and construction.
What humidity level is best for hardwood floors after installation?
Keep the home between 30 and 50 percent relative humidity and 60 to 80 degrees Fahrenheit year round. Holding that range keeps the wood near the moisture content it was milled at and limits seasonal expansion and shrinkage.
Can hardwood flooring acclimate for too long?
Yes, when the room is not held at normal conditions. Boards left in a humid, unconditioned space keep absorbing moisture and drift out of range. Correct conditions matter more than extra time on the floor.
Getting the Timing Right Before Installation
A hardwood floor rewards the patience you give it before the first board is fastened down. Set the room to normal conditions, measure the subfloor, let the wood reach equilibrium, and confirm the range before installation begins. These early steps help the boards settle properly and keep the floor stable long after installation.
That same attention to preparation is built into every floor we install at Floorika Fine Hardwood in Brooklyn. We guide you through acclimation before delivery and carry that care through the full installation, giving the wood the right start from the ground up.