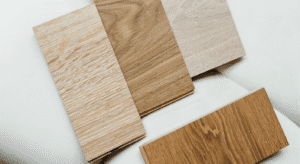
Thinking about those gorgeous hardwood floors you’ve been dreaming of? You’ve spent hours picking the perfect wood color and already checked prices. But what you may have forgotten is the concrete underneath.
Yep, that boring concrete slab. Turns out, it’s actually the most important part of the whole project. Skip the preparation work on your concrete subfloor, and you’re asking for thousands of dollars in costs to be paid later.
Why This Concrete Thing Matters So Much
Your concrete might look fine. It might feel solid when you walk on it. But looks can fool you.
Here’s a number that should wake you up. About 90% of flooring failures happen because of moisture problems. Not because the wood was bad. Not because someone messed up the install. But because nobody took the time to prepare that concrete right.
You’re about to spend money on beautiful hardwood floors. Why would you risk it by rushing the foundation?
What You Need to Check First
Walk around your room and look at that concrete. See any cracks? Feel any bumps or dips? Here’s your checklist:
- Any moisture hiding in the concrete
- Cracks that need filling
- Bumps or low spots that aren’t level
- Old glue or paint stuck to the surface
- Basic dirt and dust everywhere
According to the National Wood Flooring Association, your concrete needs to be clean, dry, flat, and strong. Get them right and you’re halfway to perfect floors.
Testing for Moisture – DON’T Skip This
This is the part where people get lazy. And if you are here reading this, it’s advice to not be one of them.
Grab a 2-foot piece of plastic. Tape it down to your concrete nd seal every edge. Now wait 24 hours. Come back the next day and check under that plastic. See water droplets? That’s moisture. And that means you’ve got work to do before any hardwood floor installation.
Professionals inspect differently. They measure exact moisture levels. For hardwood, you want less than 3 pounds of moisture per 1000 square feet in 24 hours. Sounds technical, but it’s just a safety number. Go over it, and your floors will warp later.
We’ve seen concrete that’s 30 years old still releasing moisture. Age doesn’t mean dry. Your climate matters. What’s under your house matters. Test it. Always.
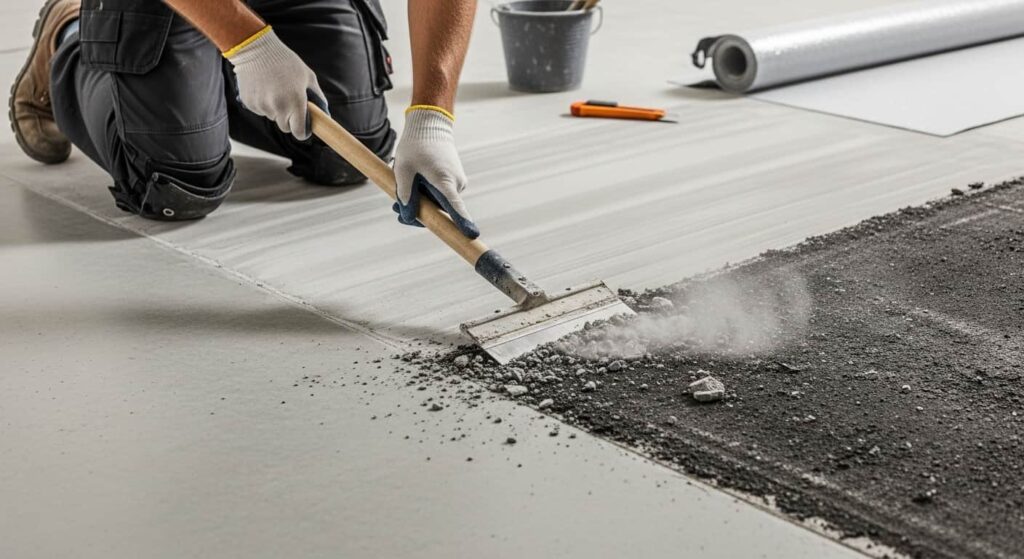
Clean That Concrete Like Your Floors Depend On It
You need to clean the concrete. Not just sweep, we’re talking deep clean here.
- Your cleaning steps:
- Sweep up all the big stuff first
- Vacuum everything with a good vacuum
- Scrape off any old adhesive or paint
- Use a degreaser if there have been oil spills
- Make sure nothing’s left on that surface
Old glue stuck on there? Get a scraper. Stubborn paint? Might need a chemical remover. Just make sure whatever you use doesn’t leave its own mess behind.
Fix the Damage
See cracks? Fill them instantly. Even tiny cracks grow. They create weak spots. They let moisture through.
For small cracks, grab some concrete patching compound. For bigger problems, you need stronger stuff. Read the instructions. Let it dry all the way. Don’t rush this part. Your concrete should be flat within 3/16 of an inch over 10 feet. That’s the standard for hardwood floor installation. Too bumpy and your wood won’t sit right.
What to fix:
- Low spots need leveling compound
- High spots need grinding down
- All cracks need filling
- Uneven areas need smoothing
The Moisture Barrier Is Your Insurance Policy
Your concrete tested okay for moisture? Great, but install a barrier anyway. Weather changes, seasons change. What’s dry today might not be dry in six months. A moisture barrier is like insurance. You hope you never need it, but you’ll be happy it’s there.
You’ve got options:
- Plastic sheeting you lay down
- Liquid barriers you roll on like paint
- Fancy systems with extra features
A good barrier can handle up to 5 pounds of moisture per 1000 square feet. That’s your safety net.
If you use plastic, overlap the seams by 6 inches. Tape them good. No gaps, and you’re making a seal that protects your investment.
Temperature and Timing Matter
Here’s something nobody tells you. Temperature affects hardwood floor installation. You want the room between 60 and 80 degrees. Humidity should be 30% to 50%. Why? Because wood moves. It grows and shrinks with temperature and moisture.
Install in weird conditions, and your wood will shift later. Then you get gaps, buckling, squeaking.
Let your hardwood sit in the room for 3 days before installing. A week is even better. It needs to adjust to where it’s going to live.
What Happens When You Skip Steps
You skip the moisture test. You lay down your beautiful hardwood. Looks amazing for a few months. Then reality hits:
- Your floors start cupping at the edges
- Gaps open up between boards
- You hear squeaking when you walk
- Worst case? Mold starts growing underneath
Fixing bad work costs 3 to 4 times more than doing it right the first time. Your hard-earned money that could’ve been used for furniture or a vacation.
We’ve met homeowners who cried over this because it became a nightmare they couldn’t afford to fix.
Let Floorika Fine Hardwood Do It Right From the Very First Day
You can try some of this yourself. Cleaning and basic stuff? But moisture problems? Major repairs? That’s when you need us, who know what they’re doing.
Floorika Fine Hardwood has been handling hardwood floor installation the right way for years. We’re in Brooklyn, serving all five boroughs and beyond. We don’t cut corners on subfloor preparations because we know that’s what makes floors last. Visit our showroom on 4th Ave or call us.